How did it get so late so soon?

Dr Seuss


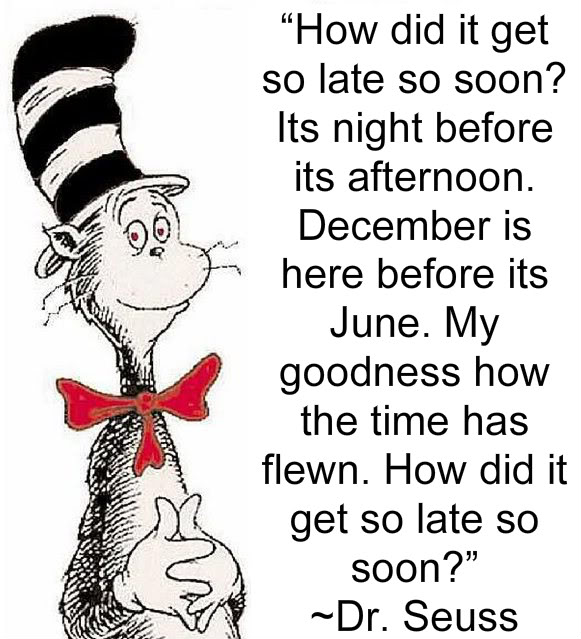
Despite its questionable grammar and lack of apostrophes, I like the Dr. Seuss poem above. It highlights a common difficulty faced by many teachers.

  • 5 minute warmer took 25 minutes?
  • Lesson ended on a grammar presentation?
  • No time for practice?
  • No time for feedback?

Sounds familiar?


Timing is something most teachers I know have issues with, myself included. We can’t and shouldn’t always expect things to go exactly to plan, often it’s a good thing if it doesn’t, it can mean learners get more out of the activity and perhaps the teacher is working on the emerging needs of the students, teaching them rather than the plan.

But what if that is at the expense of practice of the target language? I guess it all comes down to the main aim of the lesson, if there is a clear systems focus in the lesson aim, then practice of the new language is one of the most important stages of the lesson.


Some tips for working on timing

1. Get to the meat early
If your lesson has a grammar or vocabulary aim, then this language needs to be introduced early in the lesson so there is sufficient time for important practice and feedback on production.

2. Think carefully about your aim when using a text based approach
Many coursebooks use texts as a contextual vehicle for presenting grammar or vocabulary.  This puts the language in context, which we all know is important. However, in order to exploit the text fully for meaning, we need time; some texts could quite easily be stretched out for an entire lesson. Think about this at the planning stage, is your aim skills development or language development? Think about adapting the text or splitting the lesson into two separate lessons, one based on skills and one based on language.

3. Use milestones
Think how long your lesson is and when realistically, you need to be analysing the language with your students. If the lesson is only an hour, then this would probably need to be within the first 15 to 20 minutes in order to allow sufficient time for practice.

4. Plan backwards
What is the most important part of your lesson? When answering this, you’ll need to look at your main lesson aim. If you have a developmental aim such as ‘by the end of the lesson, the students will be better able to use past tenses in the context of speaking about a childhood memory‘ then clearly the productive phase towards the end of the lesson is most important. Plan this stage first and work backwards, this may help you prioritise the stages of the lesson.

5. Plan for a shorter lesson
If your lesson is 80 minutes long, try planning for just 60 minutes. In my experience it is much more common that there’s not enough time in a lesson rather than there being too much time.

6. Allow space for feedback
This is a valuable stage of the lesson and all too often jettisoned. For tips on dealing with this stage, see my earlier post on delayed error correction.

7. Allow space for work on emerging language
Respond to the language the learners are using, and importantly what they are not using. Listen out for what they are not saying, upgrade the language, explore new items in depth. Review this language at the end of the lesson.

8. Less is more
There is a lot to be said for this old adage. Have the confidence to go in to the classroom with less material and aim to get more out of it and really listen to the learners and respond to them.


Timing is not an easy thing to get right, but these tips really help me in my lesson planning.

Any more tips anyone?

Posted in Sides | Tagged , , , , , , | 12 Comments

Headway in Harrogate

IATEFL bloggerThis is my first post as a registered IATEFL online blogger. I’ve never actually attended IATEFL but have always found the online sessions a valuable resource and hope to share some over the next week or so.

First up, a session by Liz Soars, of Headway fame.
Headway seems to polarise teachers I’ve met. Nobody can question its success but I know teachers who love it and teachers who hate it. Personally speaking it’s one of my favourite coursebooks and I’ve delivered many successful lessons and courses using it.

In this talk, Liz tries to answer the ten most frequently asked questions she gets about Headway. Inevitably, there is not time for all of them, as she tells anecdotes about the story of Headway from the early days to current editions.

The talk can be viewed below, it starts about 35 seconds in:


Alternatively, the video can be viewed directly from the Harrogate Online website.

Humble beginnings‘An Intermediate Revision Book’
We all look at textbooks and think we could do better, and that’s exactly how Headway began, a couple of teachers having a bash at it themselves. Liz talks about how success isn’t something that you can plan for and needs to be something more heartfelt and this certainly comes across as she talks about how the course came together.

Staying true to itselfA Headway Credo
In the levels and new editions that followed, and in spite of apparent pressure from publishers for a new USP (unique selling point), the books stayed true to themselves. Liz reflects that perhaps this may have caused some teachers and publishers to suffer from ‘Headway fatigue’.
The ‘Headway Credo’ remained however, as the books developed:

  • An integrated course: a skills, grammar and vocabulary package.
  • Clear aims: clear to both students and teachers, both understand why they are being asked to do something.
  • Up Front Grammar: Overt grammar focus alongside skills work, giving students something concrete to take away from the hour and a half they may only have to study English in one week.
  • A book that is useful for teachers: Teachers can dip in and out of it, adapting it to the needs and interests of their students.
  • Rooted in the classroom: Tried and tested by the writers themselves, looking back at what is written and thinking, would I, as a teacher, actually do this with students?

Trying to avoid blandness: Teachers can do with a class what coursebooks writers can’t.
It is increasingly difficult for writers to get permission to include discussion about more contentious issues in their coursebooks, given that they are written for an international market. Teachers, on the other hand, have the luxury of knowing how far they can take things with their class. Liz and John tried to find ways of raising questions without offence, for example, including a unit on restorative justice or immigration. The coursebook looks objectively taking a historical viewpoint while the teacher’s book suggests the teacher looks at what is happening in the world around them to personalise the topic and decide what is appropriate to bring into the class to deal with the subject.

ELT dinosaurs: Entering the digital age
Liz suggests that publishers in a race to become digital, would benefit from consulting teachers and writers about what tools are actually useful. She mentions concerns about certain terminology entering the market: ‘products, content providers and customers’ replacing ‘books, writers and students’. She argues that, in ELT, face to face courses will always be necessary to keep students motivated, maintain a human touch, and allow ideas to develop.

All in all, a fascinating insight into the writing process and challenges coursebook writers face in getting a book out in an increasingly international and digital market.


What I took from this talk

As a teacher, and manager of teachers in a school using the Headway series, I found it fascinating to hear about how the course came together and to understand the vision Liz and John had when writing the books. I agree that the books allow teachers to use them as they want to, moving in and out of the book and personalising material according to the needs and interests of the class. Whilst it may not have the instant ‘pick it up and teach’ ability that some other titles may have, it has as excellent teacher notes which make it accessible for both newly qualified teachers and experienced teachers.

I found Liz’s views on the ‘upfront grammar focus’ interesting and I’d like to discuss this view with other teachers. Working in a community school in a non-English speaking environment, an interesting question we should ask ourselves is ‘how can we best use this hour and a half lesson to give students something solid to take away with them?’ Students in our context don’t have much opportunity out of class to pick up the language so need to be able to leave the classroom having taken away something they can add to and build things around. Liz suggests that grammar does just that.

One of Headway’s strengths in my view is the clear aims that Liz mentions. For example, I believe that Headway deals with receptive skills work really well. Many coursebooks integrate reading and listening texts into grammar and vocabulary lessons while Headway enables the teacher to easily devote entire lessons to developing skills. These receptive skills lessons often have a high communicative focus too, making use of jigsaw texts for example. Most of the skills work lessons can easily be stretched to an entire lesson and I think that this ‘less is more’ approach is really valuable for students.

Had I been in the audience, I would have asked Liz about the characters in the books. Particularly in the lower levels, some of them are really memorable. Teachers and students I have worked with have really enjoyed this aspect of the books and I wonder where the inspiration for these characters came from. I understand many of them are real people, a great example being Seamus McSporran – the man on the Scottish Island with 13 jobs. I read the other day that he has now retired, perhaps that’s why he has disappeared from the new edition of Headway Elementary!


Some questions for anyone reading this:

1.What did you take from this talk?

2.What are your views on the Headway series?

3.What would you have asked Liz?

Posted in Mains | Tagged , , , , , | 2 Comments

Liven up a Listening

Not sure what to do with a listening text coming up soon in the unit?
Don’t like the comprehension questions in the book?
Want some ideas to liven it up?


Pre-listening

Prediction work can be a really useful pre-listening activity, preparing the students for what they are about to hear. Students can use their world knowledge of the topic area along with their linguistic knowledge in order to make predictions about content (this is often referred to as activating schematic knowledge).

  • KWL charts

This is an idea I took from JJ Wilson’s excellent book, How to Teach Listening.
KWL stands for Know, Want to know, and Learnt.
This idea encourages discussion of the topic before listening to raise students’ interest and give them a reason to listen.

The basic procedure:

1. The teacher introduces the topic of the listening, for example, ‘an interview with a travel writer’.

2. Students draw a table in their notes like this:20140323-002826.jpg

3. The teacher asks students to complete the table with information they know about the topic, and what they want to know about the topic.

4. Students compare this with partner.
The table may now look like this:20140323-002845.jpg

5. Students then listen to the recording for global understanding (a.k.a. listening for gist), and identify which of the topics in the W column, if any, the speaker mentions.

6. Students compare with a partner.

7. Students listen again for more information and complete the L column with information that they learnt.

8. Students again compare with a partner and if necessary, they listen again for more detail.

9. Open class feedback and clarification if necessary.

10. Follow up language work and discussion.

  • Bingo

A fun and engaging vocabulary prediction task.

The basic procedure:

1. The teacher introduces the topic (e.g. weather forecasts) and gets the students to brainstorm words connected to the topic area.

2. T asks students which words they think are most likely to come up in the listening text.

3. Students write the words on a bingo card in their notes.
E.g.

20140323-011822.jpg

4. Students listen to the recording and cross off the words they hear.

5. After listening students compare with a partner.

You can try this with the weather forecast below:


Whilst listening

  • Giving students different tasks

When we listen to many things in our day to day life, we are not interested in understanding everything, but just the salient points. For example, with a listening text like the weather forecast above, we are usually only interested in the part about where we live, or where we are going to be in the next few days. A text like this, therefore, lends itself very well to giving students individual tasks when practising listening for more detail.

An example:

Using the text above, the teacher could think of a number of situations, write these on cards and give them out to the students.
E.g.

  • Student A is on holiday in the South of Spain and wants to know if it will be a good day for the beach.
  • Student B is going on a business trip visiting many countries in Scandinavia and wants to know what clothes to pack.
  • Student C is in the UK and has a walking trip planned for Wednesday and is hoping for good weather.
  • Student D lives in Switzerland and wants to know whether he will be able to cycle to work tomorrow or if he should take the car.
  • Student E is on holiday in Paris and wants to know if on Thursday it would be better to go to a museum, or on an open top bus city tour.
  • Student F is planning to visit the historical sites in Athens on Thursday and wants to to know if she will need an umbrella.

You can try this out if you like: choose a situation and listen to the weather forecast above.


In summary

So, I’ve looked at a couple of examples of approaching a listening lesson in a slightly different way. There are, of course, endless different activities for listening in class, but these are some of my current favourites. More may feature in a future post. So, if you like them and try them out, let me know how you get on!

Posted in Mains | Tagged , , , , , , , , , , | 19 Comments

Subject and Object Questions – Explained

Do your students ever have trouble using questions with and without auxiliaries?

For example:

Who won the race? (Why is there no auxiliary verb?)

What did he win? (Why is there an auxiliary verb?)

Here’s a short video I made some time ago which explains it simply.  The idea originally came from Scott Thornbury‘s excellent book, How to Teach Grammar (Unit 3).

Posted in Mains | Tagged , , , , , , | 2 Comments

Clines in Language Teaching

What is a cline?
The British Council Teaching English website defines a cline as ‘a scale of language items that goes from one extreme to another, for example, from positive to negative, or from weak to strong’.

Why are clines useful in language teaching?
Clines can be very effective in conveying and clarifying language, giving a very visual representation of meaning. They highlight shades of meaning, they are efficient and can cut down on teacher talking time. They also provide students with a good record of language to take home.

What language points lend themselves well to use of clines?
Clines are very versatile and can be used for vocabulary or grammar.
Some examples I have used follow:

Vocabulary

Temperature

20140317-194840.jpg

Expressing likes and dislikes

20140317-193640.jpg

Feelings
E.g. Degrees of hunger

20140423-184123.jpg
This could work equally well with other feelings such as anger, happiness, tiredness, or even drunkenness!

Grammar

Modals of deduction

20140429-161405.jpg

Adverbs of frequency

20140423-183852.jpg

It can be a nice idea to write the sentences or expressions onto cards and get the students to come up to the board and stick them where they think they go on the cline. If you are technologically minded and have access to an IWB, you could also get them to drag the expressions to the appropriate position. This exercise promotes peer collaboration and usually some interesting discussion.

Any other ideas for using clines in class?


I recently spoke about this topic at the IH Online Teachers Conference.  You can see the talk here:

image

Posted in Mains | Tagged , , , , , , , , , | 79 Comments

Tweaking your Boardwork

What do you do with the vocabulary that comes up in a lesson?
Where do you write it on the board?

Many teachers keep an incidental vocabulary column at the side of the board and this can have many advantages. Compartmentalising the board space allows the teacher to leave the vocabulary there for the remainder of the lesson so they and their students can refer to it throughout the class. The rest of the space can be used, cleaned and reused as necessary.

Here is an example of how an incidental vocabulary column might look:

20140223-193426.jpg

Okay, but some tweaks and more thought could make it a more valuable resource for the students. Many learners copy down everything that is written on the board and use it as a record of the class for revision and homework.

Some tweaks:

1. Write any lexical items in context.
A learner referring to their notes a week after class has more chance of remembering the items if there is a context. ‘My house was burgled last night’ is better than ‘burgle (vb)’.

20140223-180123.jpg

2. Use a colour code.
This can be as simple as just using a different colour to highlight pronunciation features or dependent prepositions. I have heard of using a different colour for different parts of speech but this seems a little complicated.

3. Highlight troublesome sounds.
Rather than transcribing the whole item into phonemic script, it is easier for the teacher and perhaps more useful for the student if just the troublesome sound is highlighted. Rather than burglar /ˈbɜːglɘ/, perhaps just highlighting the /ɜː/ is more useful for the students, or for the verb steal, just highlighting the vowel sounds in the different forms.

20140223-180759.jpg

4. Use bubbles to mark syllables and word stress.
This is very visual for the students. In addition to marking the main stressed syllable, it can also be useful to mark the other syllables.
E.g. for a word like ‘arrested’, the pattern o O o can be written above the word. When placing these bubbles, I find it is clearest if the bubbles are above the vowel sound in the syllable.

20140223-181008.jpg

5. Use substitution tables.
I believe this is called a substitution table, but please let me know if I am mistaken. These can be really useful to highlight collocations or synonyms.

20140223-181155.jpg

Putting it all together, this is how the incidental vocabulary column might look at the end of a lesson:

20140223-192447.jpg

This can then be used for a quick review at the end of the class.
Some ideas:
1. Erase the words, leaving just the first letter to see if the students can remember the items.
2. Play ‘backs to the board’ but rather than writing words up, simply point to them on the board for the other students to describe to the person in the hot seat.

Has anyone else got any more tweaks?

Posted in Desserts, Sides | Tagged , , , , , , , , , , | 28 Comments

Riverbank

Riverbank.jpg

Also known as a board jump, this versatile activity can liven up grammar and get students up out of their seats in a controlled TPR practice activity.

This is good for language points which have two (or three) options to choose from, for example:

  • ‘for’ or ‘since’ with time expressions used with the present perfect
    E.g. ‘I’ve lived here for 6 years’ vs. ‘I’ve lived here since 2008′.
  • countable and uncountable nouns
    E.g. ‘work’ – uncountable vs. ‘job’ – countable.
  • infinitive or -ing form verb patterns
    E.g. ‘I decided to go‘ vs. ‘I enjoyed going‘.
  • progressive assimilation in pronunciation of past simple regular verbs
    E.g. wished /t/, lived /d/, wanted /Id/.
  • prepositions of time
    E.g. in the morning, at 6 o’clock, on Wednesday.
  • collocations with delexicalised verbs such as ‘make’ and ‘do’
    E.g. ‘make an effort’ vs. ‘do some exercise’.

The basic procedure

1.  T gets students to stand in a single line facing the board.  Make sure there is plenty of space either side of this line.

2.  T writes one answer on the left of the board and one on the right.
E.g.

20140209-234523.jpg

3. T explains that they will say some expressions and students need to quickly decide which answer is appropriate and then jump to the left or the right according to their ideas.

For example with ‘for’ and ‘since’
T says ‘2006’ – students should jump right towards ‘since’.
T says ’10 minutes’ students should jump left towards ‘for’.
‘3 years’ – ss jump left.
‘4 o’clock’ – ss jump right.
‘I was a child’ – ss jump right.
‘A long time’ – ss jump left.

4. T demonstrates the activity to check the students have understood.

5. T calls out expressions and checks students are jumping in the right direction (you may find half the students jump right and half jump left, in which case further explanations about the language are required!)

6. It is a good idea to let the person at the front of the line go to the back after a couple of turns as they are the only one who can’t copy the others!  Also make sure ss return to the middle before calling out the next expression.

A quick, easy, memorable and fun way to check understanding. The TPR nature of the activity appeals to young learners but I’ve found it works equally well with adult classes.  Works well as a quick warmer or cooler at the beginning or end of the lesson too.

Posted in Aperitifs, Desserts, Kids menu, Mains | Tagged , , , , , , , , , | 7 Comments

My Limoncello Recipe

imageI make this pretty regularly and am frequently asked how it is made, so here goes; it’s surprisingly simple and the results are great!  It works equally well with mandarins for a ‘mandarinetto’.

Ingredients

Lemons
image

20140216-000609.jpg          20140216-000618.jpg

I took mine from this tree on the volcanic island of Salina in Sicily. If you don’t have a lemon tree near you, look for unwaxed lemons as it is only the zest that we’re interested in. You’ll need around 7 or 8 good sized lemons.

Alcohol

imageIf you can source it, try to get pure alcohol, available in supermarkets here in Italy. Not sure if you can get in the UK, I guess us Brits have too many alcohol issues and we aren’t responsible enough. I have heard of recipes where a tasteless vodka is used to substitute it. I haven’t tried this myself though, and I guess you’d need to change the proportions as this stuff is 95% and vodka is around 40%.  500ml of alcohol will make over a litre of limoncello.

Sugar
Any normal caster sugar is fine.
For a litre of limoncello, you’ll need around 400 to 500g sugar depending on how sweet you like it, I prefer it less sweet so usually use 400g.

Water
Between 500ml to 700ml, depending on how strong you want the limoncello, I usually go for 700ml so you get more limoncello and it’s still pretty strong.

Preparation

1. Wash the lemons.

2. Carefully remove the peel from the lemons. You only want the yellow part, the white part will make it taste bitter. I use a potato peeler to remove the peel and using a zig zaggy technique gets it off easily and nice and fine.

20140216-001541.jpg   20140216-001627.jpg

3. Put the peel into a bottle and add the alcohol.

20140216-001726.jpg

20140216-001753.jpg4. Shake and leave in a dark place for at least two weeks, shaking every day.

Wait, keep shaking!

5. After a couple of weeks you need to make a sugar syrup.

20140216-002508.jpg

Add 400g of sugar to about 700 ml of water in a pan.  Heat the sugar and water over a low flame until the sugar completely dissolves. Make sure the alcohol is nowhere near the flame!

6. Allow the syrup to cool to room temperature.

7. While it is cooling, decant the alcohol into another bottle, filtering the liquid to remove any bits of lemon.
20140216-002523.jpg

8. When the syrup is cool, add it to the alcohol and shake. It should turn a wonderful cloudy colour.
20140216-002550.jpg
20140216-002623.jpg

9. Decant into appropriately sized bottles and store in the freezer, it won’t freeze and it is best served ice cold.

10. Enjoy with friends as an after dinner ‘digestivo’, drunk from small shot glasses.

image

Posted in Recipes | Tagged , , , , | 2 Comments

Getting to Know You with an Acrostics Poem

We have new courses starting this week at school so I thought I’d share my favourite getting to know you activity to use with a new class. The original idea of using an acrostics poem came from a session by Jeremy Harmer at the IH DoS Conference a couple of years ago and this inspired my colleague Amy Braid to adapt the idea for use with a new class.

The basic procedure

1. Show the students an example of an acrostics poem with your name. E.g.

Jonny Ingham

2. Students write their name vertically down the left hand side of a page.

3. Students think of sentences beginning with the letters of their name to create their poem.

4. T monitors, helping students with ideas and language, encouraging them to play with sentence structure (cleft sentences, fronting, inversion etc. e.g Yoga is what I like doing, never have I written a poem).

5. When students are happy with their poems, they copy them onto a new piece of paper with coloured pens and pencils.

6. Put the poems on the walls around the classroom (like a gallery).

7. Students walk around the classroom individually with a notebook and a pen, they write one question for each person based on the information that they read, they will ask this question later (e.g. How long have you been doing yoga? Do you think you will ever write another poem?). T could play some music in the background while they are doing this.

8. Students then mingle and ask each other their questions. T monitors, taking notes of language to focus on in feedback (for tips on this, see my previous post on delayed error correction).

9. Students sit down and tell their partner everything they can remember about the other students.

10. Teacher conducts feedback, first on content, then language.

11. Leave poems on wall to help you remember the students’ names in future lessons!

Posted in Mains | Tagged , , , , , , | 6 Comments

Kaboom!

This activity is variously known as kaboom, earthquake and typhoon, perhaps depending on which staffroom or hemisphere you are teaching in.

It’s a good staple for kids courses; it’s gone down well whenever I’ve used it, even with adults. It’s also very versatile, it can be used for revision of any recently studied language, and the competitive element makes it ideal for a stirrer activity to liven up bored teens, or as a reward at the end of a kids class.

The basic procedure:

1. Before class, the teacher prepares a list of questions for the students to answer. These could be related to recently studied language, general knowledge, or a mix of both.

2. T prepares a small grid with a combination of ?s, Bs and Ks

20140201-185219.jpg

3. T draws the following grid on the board.

20140201-184432.jpg

4. Split the class into 2 or 3 teams, asking them to come up with a team name (an adjective and an animal usually works well, e.g. The Crazy Rabbits).

5. Explain that each team takes turns choosing squares and under each square are 3 possibilities:
– a question – if they get this right, they get 50 points for their team.
– a bonus – they get 25 points for free (no question)
– a kaboom! – the team loses all their points.

6. Teams start choosing squares, answering questions, T keeps score on the board.

7. The winning team is the team with the most points at the end. The board will look something like this at the end:

20140201-193744.jpg

Some tweaks

– You could have different levels of difficulty for the questions, some squares could have ?? and be worth 75 points for example.
– You could add some ‘C’ squares to the board, if they get a ‘C’, they exchange points with the other team.
– Once students have become familiar with the activity, you could hand over to them, get them to create questions and grids and do the activity in smaller groups, or get one student to be the teacher.
– Instead of coordinates, you could use phonemes as in the example below. Ss then rather than saying D2. have to say ‘cheese’, and A1 becomes ‘pear’ for example.

20140201-195750.jpg
(This idea is adapted from Phoneme Battleships in Pronunciation Games by Mark Hancock.)

Posted in Desserts, Kids menu | Tagged , , , , , , , , , , , , | 12 Comments

Tweaking Delayed Error Correction

One of the most difficult tasks for teachers is listening to the learners when they are speaking and finding appropriate things to give them feedback on.

A common approach is to provide a delayed error correction slot when the learners have finished: writing some of the learners’ utterances on the whiteboard and then getting them to try to correct them. Whilst this can be effective, some tweaking can make it even more so.

Some tweaks:
1. Write the utterances in their context; it can be difficult to correct without this information.
2. Include examples of good language too; this praise can be motivating for the students and can be an opportunity for the students to learn from each other.
3.Think of ways to avoid the dead time involved with writing sentences up on the board. Can you use a tablet or, dare I say it, an OHT/OHP, to write the utterances down whilst the learners are speaking and then project it onto the board?
4. Blanking out the mistake can be effective, it makes learners question their ideas.
5. Listen out for what they are not saying and look for opportunities to upgrade and reformulate their language.
6. Encourage learners to think about how to say the same thing in another way.
7. Plan to get to this feedback stage with enough time to really explore the language and clarify things.
8. Give them feedback on their pronunciation too.

Look at an example of a whiteboard with some feedback from a speaking task about shopping below:

Jonny Ingham

Has anyone else got any more tweaks?

image

Posted in Desserts | Tagged , , , , , , , , | 16 Comments

M/F/P – Meaning, Form and ?

When analysing language and presenting it to students, we are often told on teacher training courses that we need to look at three areas: meaning, form and pronunciation (m,f,p).

In many language lessons I have observed, the ‘p’ is the one which is given the least classroom time and it seems that it is all too easily marginalised. I was fortunate enough to participate in a fantastic workshop by Robin Walker recently where we spent 3 hours looking at the priorities when teaching pronunciation and practical ideas for working on this vital area with students in class. You can read more about Robin and his research into pronunciation and English as a Lingua Franca (ELF) here in his excellent blog.

Working on pronunciation in class

The basic premise – recognition before production
Students need to be able to hear and notice the difference between sounds before they can be expected to produce them. Therefore listening exercises in which they are practising discrimination are vital first steps in pronunciation work.

It can be useful to use minimal pairs to help students to discriminate one phoneme from another similar one, especially when the sounds don’t exist in the students’ L1.  Italian students, for example often struggle to hear the difference between the /æ/ and the /ʌ/ in cat and cut as there is no equivalent phoneme to /ʌ/ in Italian.

Same or Different?
A simple discrimination exercise in which the teacher says two words with a slight pause between.  Students then respond: ‘same’ or ‘different’.

E.g.
T: ‘cat cat’
Ss: ‘same’
T: ‘cut cat’
Ss: ‘different’

Odd Man Out
Another simple discrimination exercise in which the teacher says a string of three or four words, one of which is different. The students respond with the number of the the word which was different.

E.g.
T: ‘cat cut cat cat’
Ss: ‘2’
T: ‘cut cat cat cat’
Ss: ‘1’

One or two?
Write the words on the board in two columns numbered 1 and 2 and highlight the phoneme. See whiteboard picture below:

image
After modelling the two sounds, say one of the words and ask students to tell you if they heard word 1 or 2. Continue this until they are demonstrating a better ability to differentiate the sounds and then up the challenge by saying two or three words in a row, e.g. ‘Cat, cat, cut’, to which students must reply 1,1,2.

Even more challenge can be added by using other words with the same sounds:image

Handing over to the students
These exercises can then all be handed over to the students, individuals can say the words and the class and the teacher can respond with what they heard.  The next step of course, can be handing over completely for students to continue in pairs.

For more ideas on working on pronunciation with your students, there are some great activities in Mark Hancock’s excellent book ‘Pronunciation Games’. A valuable resource book every teacher should have access to.

Posted in Mains | Tagged , , , , , | 1 Comment

At Last – a Recipe!

Dal fry

20140121-084225.jpg    20140121-084131.jpg

I picked this recipe up on a recent trip to Kerala, from a wonderful lady called Maria at her cookery school in Kochi.

Ingredients
1 cup of dry lentils (yellow split peas)
3 cups of water
1 tsp. black mustard seeds
1/4 tsp. cumin seeds
4 or 5 shallots (2 tbsp.) – chopped
3 cloves garlic – chopped
1 tsp. turmeric
1 1/2 tsp. chilli powder
1 tsp. salt
A few curry leaves or chopped coriander leaves
Vegetable oil

Directions
1. Soak the lentils overnight in 3 cups of water.
2. Rinse off twice the next day.
3. Add lentils to a saucepan with 3 cups of water and a teaspoon of oil (no salt).
4. Cook for 15 mins (or more if you want it more mushy).
5. Put a little oil in a pan over a moderate heat and add the mustard seeds. They will start to pop and smell like popcorn.
6. Lower the flame and add the cumin seeds (these help to remove gas).
7. Add the shallots and garlic and cook until golden brown.
8. Lower the flame and add the powders – put them onto the onions so they are not in direct contact with the oil.
9. Add the leaves.
10. Take off the heat and stir – the chilli burns fast.
11. Put back on a low flame and add to dal mix.
12. Serve with rice.

20140121-084311.jpg 

Posted in Recipes | Tagged , , , | Leave a comment

Something Authentic – My favourite song for hypothetical language – Young Rebel Set

I’m sure every EFL teacher has their favourite song to use when working on conditionals. Mine is by an indie rock band from the north east of England called ‘Young Rebel Set’ and the song is called ‘If I was’. I first heard this on the BBC Radio 2 Saturday Sessions and, as is the curse of the EFL teacher, immediately thought about how to use it in a lesson.

The song is easy for students to follow, tells a simple story and is full of examples of unreal conditional sentences. It also has a couple of examples of ‘I wish’ with the past perfect to express regret. It uses the more colloquial, but very common, ‘if I was’, rather than ‘if I were’ and to top it off, has some great northern vowels in it.

What’s your favourite song for working on if clauses?

20140208-001950.jpg

Posted in Something Authentic | Tagged , , , , , , , , | Leave a comment

Something Authentic – ‘Flying’ by Seize the Day

A great song and video about the environment by a radical English acoustic band. The song’s lyrics talk about the effect on the environment that flying can have, while at the same time accepting that it would really be very difficult to take the decision not to use aeroplanes.

‘I will recycle, I’ll ride my bicycle, I’ll walk into town, I’ll turn the heating down, I’ll fill my kettle halfway, listen to everything else you say… but don’t take my wings away.’

Most coursebooks these days have a unit or a lesson on being green, so some good supplementary material here. More info on the band can be found at http://www.seizetheday.org.

P.S. One of the singers just so happens to be my sister.

Seize the Day

Posted in Something Authentic | Tagged , , , , , , | 1 Comment

One for the Kids Classes: Stepping Stones

Image

This is good for practising word order in simple sentences with younger learners (8-12). It takes a bit of preparation though.
It basically involves lots of pieces of paper on the floor, each one with a word written on it. The words should all come from the target language structure. The kids then cross the classroom jumping from word to word forming sentences.

1. Get a load of scrap paper, big enough for a children’s feet!
2. Write all the possible words you need to make positive, negative and interrogative questions on the pieces of paper. You could use a colour code, with the subjects one colour, verbs another, auxiliary verbs another etc. Make sure you have an additional one with a full stop and another with a question mark.
3. In class spread out the pieces of paper on the floor in the centre of the classroom.
4. Demonstrate the activity crossing the classroom by jumping from word to word. Get the students to read out the sentence as you jump. You could then model an incorrect sentence and fall in the water!
5. Hand over to a stronger student and ask them to cross the classroom. Ensure the others are watching and reading out the sentences, ensuring they are correct.
6.Nominate further students to cross the classroom and make different sentences.

This can be a bit faffy to prepare and set up but is enjoyable and gets the students thinking word order in a more fun and interactive way. Don’t let it go on too long though, kids this age generally have pretty short attention spans!

Posted in Kids menu | Tagged , , , , , , , , | 2 Comments

50/50 correction: My favourite error correction technique

20140115-122234.jpg

A simple but effective technique for on the spot ‘hot’ correction.

Look at these example classroom interactions:

Student: I /laɪked/ Paris very much.
Teacher: You /laɪked/ or /laɪkt/?
Student: /laɪkt/

Student: I have never ate Chinese food.
Teacher: ate or eaten?
Student: eaten

Compare this with simple recasting by the teacher:

Student: I have never ate Chinese food.
Teacher: You’ve never eaten Chinese food
Student: No, I don’t like spicy food.

Recasting, whilst effective in some cases can be missed by the student as they may not realise that a mistake has been made. Using the 50/50 technique makes the error much more overt and importantly requires the student to repeat the correct form.

This technique is quite effective and efficient with pronunciation mistakes and simple grammatical or lexical slips. In my experience, students seem to quite like it too.

I learnt this technique from my Delta trainer at International House London and have been using it ever since.

Posted in Sides | Tagged , , , , , , , | Leave a comment

Starting with a Definition

Image

An easy and surprisingly engaging way to lead into the topic or theme of a lesson can be to get the students writing a definition of the word central to the topic.  Many lessons and units in coursebooks have titles such as ‘Survival’, Challenges’, ‘Culture’, Media’, or ‘Art’.  These more abstract ideas can be interesting to define.

A suggested procedure:

1. Write the word on the board with part of speech and phonemic transcription, as it would appear in the dictionary.

2. Ask the students to discuss the meaning of the word with a partner.

3. Tell the students you would like them to write an approximate definition of the word and give them a couple of minutes to do so.

4.  Students compare definitions with a parter, then work together to write one.

5. Students compare with another pair.

6. T asks ss for their definitions.  This stage is interesting as some students usually explore slightly different parameters of meaning.

7. T writes dictionary definition on the board for students to compare.

This may not sound that interesting but I have always found students to be very engaged by this type of exercise and it really gets them thinking about the topic at a greater depth.  Give it a go!

Image

Whiteboard

Posted in Starters | Tagged , , , , , | Leave a comment

Warmer of the week: ladder race

20140113-224052.jpgLet’s start the ball rolling with a warmer. This is a good one for reviewing a recently studied lexical set (e.g. weather) or to introduce a topic by quickly brainstorming vocabulary connected to the theme of the lesson.

It’s very simple to set up, requires no preparation, is short and snappy and starts the lesson with a bit of energy. Works equally well with adults and YLs.

1. Draw two ladders with ten or so rungs on each half of the whiteboard (not higher than your shortest student!).
2. Split the class into two teams.
3. Each team lines up in front of the board (facing it).
4. Students need to write a word connected to the topic in each space. One student writes one word, passes the pen to the next student and then goes to the back of the line. Words must be legible and spelt correctly. Best if they go to the back on the outside rather than down the centre to avoid collisions (particularly with YLs).
5. Stop when fastest team have finished and ss sit down.
6. T gives one point for each correct word, helping ss to teach any new words to their peers and eliciting corrections for mistakes.
7. Students add any new items to their notebooks.

Whiteboard

Whiteboard

Posted in Aperitifs | Tagged , , , , , , | 2 Comments

My first blog post!

20140107-195617.jpg

I’ve finally decided to join the 21st century world of ELT and start blogging. There are now dozens of blogs out there with the musings and reflections of EFL teachers around the world and I decided that if I were ever to start a blog, it would be one in which readers can take something practical away with them. When giving or attending seminars and workshops, it is always sessions from which people can take ideas with them that are my favourite.

I hope to fill the blog with useful activities for the EFL classroom. I’ve taken the analogy of a lesson plan being like a recipe, and activities, courses in a meal.  I may also, from time to time, put up a few favourite recipes too. The blog will obviously take time to build as more activities are added and I hope that it will evolve into a useful resource for teachers.

Please feel free to comment on any posts, I welcome your feedback.

Happy teaching

Posted in About | Tagged , , , | 10 Comments